

Have you ever found the perfect logo or artwork and wondered how to stitch it on fabric using a Janome embroidery machine? Many people assume it’s as simple as changing a file extension, but embroidery files work very differently.
If you want to transform artwork to JEF embroidery format, you need more than a basic file conversion. The design must be carefully digitized so your embroidery machine understands where every stitch should go. In this guide, you’ll learn the complete process, common mistakes to avoid, and why professional digitizing creates better embroidery results. Whether you’re a hobbyist or a business owner, this guide from Digitizing Buddy will help you achieve clean, professional-looking embroidery.
What Is a JEF Embroidery Format?
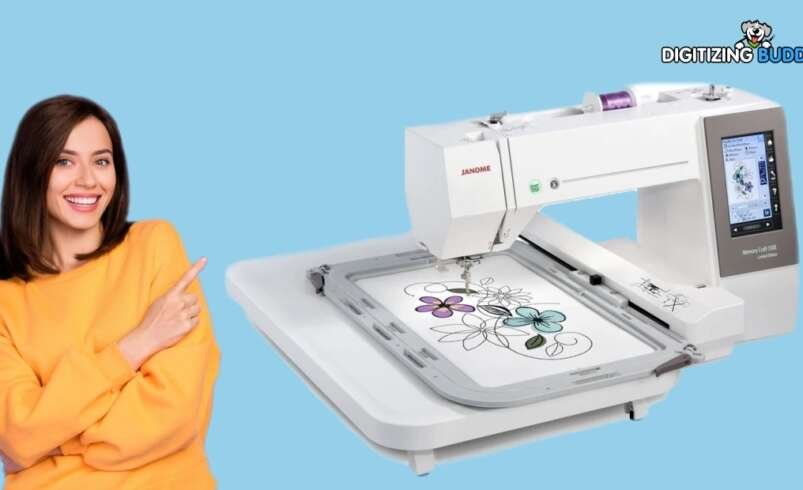
A JEF file is a machine embroidery format used by Janome embroidery machines. Unlike image files such as JPG, PNG, or SVG, a JEF file contains stitch instructions rather than pixels.
These instructions include:
- Stitch directions
- Stitch types
- Thread color sequence
- Needle changes
- Design dimensions
- Machine commands
Think of a JEF file as a roadmap for your embroidery machine. Instead of displaying an image, it tells the machine exactly how to recreate that image with thread.
Why You Can’t Simply Convert an Image into JEF
Many online tools claim they can convert artwork instantly, but embroidery doesn’t work that way.
A digital image contains colors and pixels.
An embroidery machine needs:
- Stitch paths
- Underlay stitches
- Density settings
- Pull compensation
- Stitch angles
- Start and stop points
Without proper digitizing, the machine cannot understand how the design should be stitched.
That is why professional embroidery digitizing is essential.
How to Transform Artwork to JEF Embroidery Format
Step 1: Choose High-Quality Artwork
Start with the clearest version of your design.
The best file types include:
- AI
- EPS
- SVG
- High-resolution PNG
- High-resolution JPG
Avoid blurry or low-quality images because they reduce embroidery accuracy.
Step 2: Analyze the Design
Before digitizing begins, every part of the artwork is reviewed.
Important factors include:
- Small lettering
- Thin outlines
- Color transitions
- Complex shapes
- Fine details
Sometimes artwork needs to be simplified to stitch correctly.
Step 3: Digitize Every Element
Digitizing is where the artwork becomes embroidery.
A digitizer assigns different stitch types to different areas.
Examples include:
- Satin stitches for text
- Fill stitches for larger areas
- Running stitches for outlines
Each section is optimized individually for better stitching.
Step 4: Adjust Stitch Settings
Professional digitizing includes important adjustments like:
- Stitch density
- Underlay
- Pull compensation
- Stitch direction
- Travel paths
These settings improve durability and reduce thread breaks.
Step 5: Export as JEF File
After testing and final adjustments, the design is exported into JEF embroidery format.
The file is now ready to load into compatible embroidery machines.
Benefits of Professional JEF Digitizing
Choosing professional embroidery digitizing offers several advantages.
Better Stitch Quality
Proper digitizing creates smoother stitching with fewer errors.
Cleaner Lettering
Even small text becomes easier to read when stitch settings are optimized.
Less Thread Breakage
Balanced stitch density helps the machine run more smoothly.
Faster Production
Efficient stitch paths reduce unnecessary machine movement.
Professional Appearance
The finished embroidery looks cleaner, sharper, and more durable.
Best Artwork for JEF Conversion
Some artwork converts better than others.
Ideal designs include:
- Company logos
- Monograms
- Sports emblems
- Uniform patches
- Hat designs
- Left chest logos
- Custom artwork
Simple, clean artwork usually produces the best embroidery results.
Common Mistakes to Avoid
Many beginners experience poor embroidery because they skip important steps.
Avoid these mistakes:
- Using blurry artwork
- Choosing tiny text
- Ignoring stitch density
- Overlapping objects
- Using too many colors
- Stretching designs after digitizing
- Skipping stitch testing
A little preparation can save both time and materials.
Tips for Better Embroidery Results
Getting beautiful embroidery starts before the machine begins stitching.
Use Vector Artwork Whenever Possible
Vector files maintain sharp edges and make digitizing easier.
Keep Text Readable
Very small lettering often loses detail after stitching.
Match Design Size to Fabric
Resizing embroidery after digitizing can affect stitch quality.
Test Before Production
Always stitch a sample before producing multiple pieces.
Work with Experienced Digitizers
Professional digitizing ensures every stitch is placed correctly.
Why Choose Digitizing Buddy?
At Digitizing Buddy, we understand that great embroidery starts with great digitizing.
Our experienced team carefully converts artwork into high-quality JEF embroidery files that are optimized for clean stitching, smooth machine operation, and professional results.
Every design receives individual attention to ensure:
- Accurate stitch placement
- Proper density
- Clean lettering
- Balanced underlay
- Production-ready files
- Fast turnaround times
Whether you need one logo or hundreds of embroidery designs, we focus on quality from the first stitch to the last.
LSI Keywords Used Naturally
This article also covers related search terms, including:
- JEF embroidery file
- Janome embroidery format
- embroidery digitizing
- convert image for embroidery
- embroidery file conversion
- digitize artwork for embroidery
- embroidery stitch file
- embroidery design conversion
- custom embroidery digitizing
- machine embroidery file
These related keywords help improve topical relevance while keeping the content natural.
Conclusion
Learning how to transform artwork to JEF embroidery format is about much more than changing a file extension. A successful embroidery file requires professional digitizing, proper stitch planning, and careful optimization for embroidery machines.
By starting with quality artwork, using the right stitch settings, and testing your design before production, you can create embroidery that looks sharp, runs smoothly, and lasts for years. If you want reliable, production-ready JEF files, Digitizing Buddy delivers expert embroidery digitizing services designed for outstanding results.
Frequently Asked Questions
1. Can I transform artwork to JEF embroidery format online?
Some online tools offer basic conversion, but they usually cannot create proper stitch data. Professional digitizing delivers much better embroidery quality.
2. Which artwork format is best for JEF digitizing?
Vector files like AI, EPS, and SVG are ideal because they maintain sharp lines and are easier to digitize accurately.
3. Can JPG or PNG images become JEF files?
Yes, but they must first go through embroidery digitizing before they can be exported as a JEF embroidery file.
4. Is a JEF file compatible with every embroidery machine?
No. JEF files are designed for Janome embroidery machines. Other machines may require different embroidery formats.
5. How long does it take to digitize artwork into JEF format?
The turnaround depends on the design’s complexity. Simple logos can often be digitized quickly, while detailed artwork requires additional time for careful stitch optimization.