
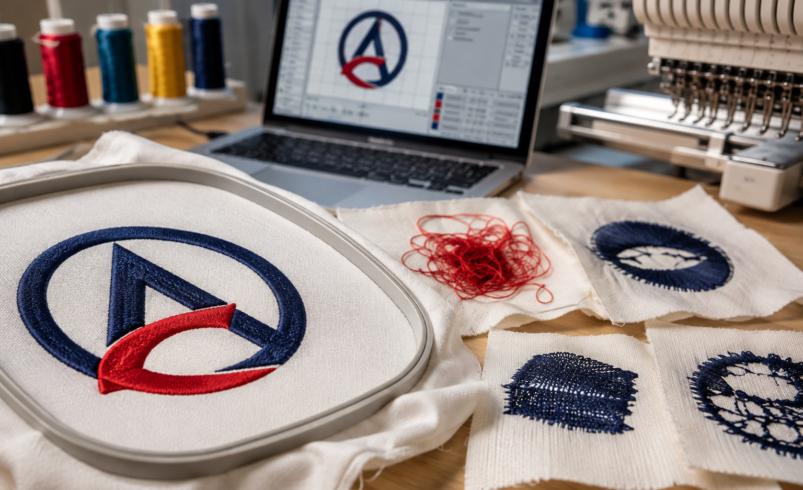

Embroidery gives clothing, accessories, and promotional products a professional appearance that printed designs cannot always replicate. From company logos on uniforms to detailed artwork on jackets and caps, quality embroidery helps businesses create products that look attractive and last through regular use. However, achieving clean embroidery requires more than selecting a design and loading it into a machine.
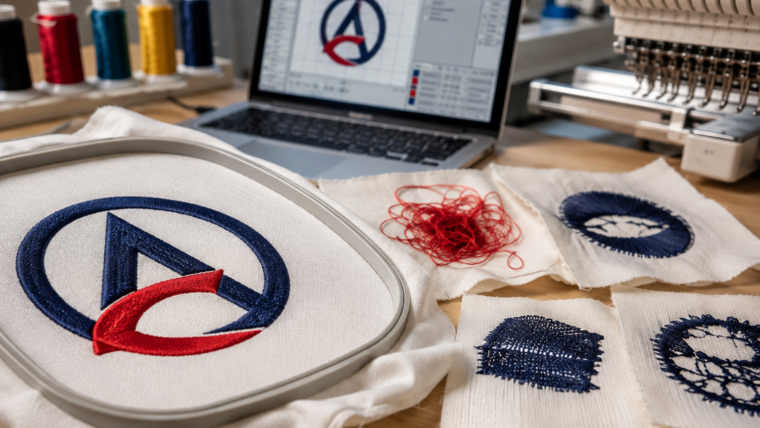
This is where embroidery digitizing services become important. The digitizing process converts artwork into machine-readable stitch instructions, allowing embroidery machines to reproduce a design on fabric. Every element, including stitch direction, density, underlay, and sewing sequence, can influence the final result.
For apparel brands, embroidery shops, and promotional product suppliers, working with an experienced digitizing team can help reduce production problems and maintain consistent design quality.
What Are Embroidery Digitizing Services?
Embroidery digitizing services transform logos, illustrations, lettering, and other artwork into digital files that embroidery machines can interpret. Unlike a standard image file, an embroidery file contains instructions about how the machine should create each part of the design.
A digitizer studies the artwork and determines the most suitable stitch types, angles, spacing, and sewing order. These decisions depend on the design’s size, the fabric being used, and the intended embroidery placement.
For example, a small company logo on a polo shirt may require satin stitches for lettering and fill stitches for larger shapes. A design intended for a thick jacket may need different settings to maintain coverage and prevent the fabric from bunching.
The purpose is not simply to reproduce the artwork on a screen. It is to prepare a design that can be stitched effectively in real production conditions.
Why Quality Digitizing Matters for Embroidery Businesses
The quality of a digitized file can affect production speed, material usage, and the appearance of the finished product. Poorly prepared files may cause thread breaks, uneven lettering, fabric puckering, or gaps between design elements.
Professional digitizing helps address these challenges before a design reaches the embroidery machine.
1. Cleaner Logos and Lettering
Company logos often contain small text, narrow outlines, and closely spaced shapes. If these elements are not planned correctly, the embroidered result may look crowded or difficult to read.
A skilled digitizer adjusts stitch direction, spacing, and detail according to the final design size. This helps preserve the important features of the original artwork while accounting for the limitations of embroidery.
2. Better Results Across Different Fabrics
Cotton shirts, polyester uniforms, fleece jackets, caps, and towels behave differently during embroidery. Some materials stretch easily, while others have a thick surface or a loose texture.
Digitizing settings must account for these differences. Appropriate underlay and density can help stabilise the design, while pull compensation helps account for the way fabric moves or stretches as stitches are formed.
Sharing the fabric type with your digitizer makes it easier to prepare a file for the intended application.
3. More Consistent Bulk Production
Embroidery businesses frequently produce dozens or hundreds of garments featuring the same logo. A reliable stitch file helps maintain consistency across repeat orders.
Once a design has been approved and tested, the same file can be used as a starting point for future production runs, provided the garment, placement, size, and machine setup remain suitable.
This is particularly useful for uniform suppliers, sportswear companies, promotional product businesses, and corporate merchandise providers.
Different Types of Custom Embroidery Digitizing
Not every embroidery project requires the same approach. Choosing the correct digitizing technique helps ensure that the design works well with its intended product.
Logo Digitizing
Logo digitizing converts business logos into embroidery-ready files for uniforms, polo shirts, workwear, caps, bags, and branded merchandise.
The digitizer considers the logo’s colours, shapes, outlines, and text to create a practical stitch sequence. Small lettering may need adjustments to remain readable when embroidered at a compact size.
Cap Embroidery Digitizing
Caps have a curved surface that makes embroidery more challenging than stitching on a flat garment. The digitizing process must account for the cap’s structure, seam placement, and the direction in which the machine will sew.
Proper stitch sequencing and underlay can help minimise distortion and improve registration. These details are especially important for structured caps and designs containing curved lettering.
3D Puff Embroidery Digitizing
Three-dimensional puff embroidery uses foam beneath the stitches to create raised lettering or shapes. This technique is popular for caps, streetwear, and promotional headwear.
The file requires suitable stitch coverage, careful sequencing, and appropriate settings for the foam and design dimensions. Not every logo is suitable for 3D puff, so artwork may need simplification before production.
Jacket Back Digitizing
Large jacket-back designs often contain multiple colours, broad shapes, and detailed lettering. They require careful planning to balance stitch coverage, flexibility, and production time.
A properly prepared file helps distribute stitches across the design while considering the thickness and behaviour of the jacket material.
Applique Embroidery Digitizing
Applique combines fabric pieces with embroidery stitches to create decorative shapes and designs. The digitized file generally includes placement, tack-down, and finishing stitches.
Accurate sequencing is important because the fabric must be positioned and secured correctly during production.
How to Choose Custom Embroidery Digitizing Services in USA
Finding the right digitizing partner is important for businesses that depend on reliable embroidery production. When comparing custom embroidery digitizing services in USA, look beyond turnaround time and price. Consider how the provider handles artwork, machine compatibility, revisions, and production requirements.
Here are some factors worth reviewing before placing an order.
Check the Digitizing Process
Ask whether the provider manually plans the stitch structure or relies entirely on automatic conversion. Automated tools may work for some simple designs, but detailed logos and specialised embroidery applications often benefit from manual adjustments.
The provider should understand stitch direction, density, underlay, pull compensation, and sequencing.
Confirm Machine File Compatibility
Different embroidery machines and software systems use different file formats. Common formats include DST, PES, EXP, JEF, VP3, and HUS.
Before ordering, confirm which format your equipment requires. If you are unsure, share your machine’s brand and model so the appropriate format can be identified.
Remember that a machine file is different from an editable source file. If you need to modify the stitch structure later, confirm whether an editable file is included in the service.
Review Revision Policies
Sometimes a design needs adjustment after a sample is stitched. A dependable provider should explain how revisions work and what information is needed to make corrections.
A clear photograph of the sample, along with details about the fabric, stabiliser, thread, and machine settings, can help identify the cause of a problem.
Also check whether revisions cover corrections to the original instructions or whether changes in size, placement, or design require a separate order.
Compare Value Instead of Price Alone
A low-cost file may seem attractive, but repeated thread breaks or poor stitch coverage can increase production costs. Consider the complete workflow, including digitizing quality, communication, delivery, and revision support.
For commercial embroidery businesses, dependable files can be more valuable than choosing a provider based on price alone.
The Process of Turning Artwork Into an Embroidery File
Professional digitizing usually follows a series of steps designed to prepare artwork for machine production.
Step 1: Submit your artwork
Provide your logo, illustration, or design in a suitable image or vector format. Include the desired dimensions, garment type, embroidery placement, machine format, and deadline.
Step 2: Review the design requirements
The digitizer examines the artwork and identifies details that may require adjustments, such as very small text, narrow outlines, or complex colour transitions.
Step 3: Create the stitch file
The artwork is converted into machine instructions. The digitizer plans stitch types, direction, underlay, density, and sewing sequence according to the intended application.
Step 4: Check the file
The file is reviewed for obvious sequencing or design issues. A digital preview can help identify problems, although it cannot fully replace a physical sample.
Step 5: Test the embroidery
Run a sample using fabric and stabiliser similar to those intended for the final product. Check lettering, registration, coverage, and fabric tension before proceeding with a large order.
Step 6: Make necessary adjustments
If the sample reveals issues, share clear feedback with the digitizer. The file may need adjustments to improve its performance under the actual production conditions.
Common Embroidery Digitizing Mistakes to Avoid
Even attractive artwork can produce disappointing embroidery when the file is not prepared for the intended material and size.
Some common mistakes include:
- Using excessive stitch density: Too many stitches can make the design stiff, increase thread usage, and contribute to fabric damage.
- Making lettering too small: Fine details may disappear or become difficult to read after stitching.
- Ignoring fabric type: A design suitable for a firm polo shirt may not work equally well on stretchy knitwear or thick fleece.
- Choosing the wrong stitch type: Satin, fill, and running stitches serve different purposes and should be selected according to the design.
- Skipping a test sew-out: A design that looks correct in software may behave differently on the actual garment.
- Providing incomplete instructions: Missing information about size, placement, or machine format can lead to unnecessary delays and revisions.
Avoiding these mistakes helps embroidery businesses improve quality control and reduce avoidable production issues.
Why Rise Digitizing Is a Practical Choice for Custom Embroidery Projects
Rise Digitizing provides embroidery digitizing services for businesses and individuals who need artwork converted into machine-ready files. The service supports projects such as logo embroidery, cap designs, jacket backs, applique, and 3D puff.
Customers can submit their artwork and specify the intended dimensions, fabric, placement, and required file format. According to the service information on its website, Rise Digitizing offers manual digitizing, fast turnaround options, and revisions for its customers.
The company also lists common embroidery formats, including DST, PES, JEF, EXP, and VP3, helping customers request files suited to different embroidery workflows.
Whether you manage an apparel business, operate an embroidery shop, or need a single custom design, providing accurate production details at the beginning can help the digitizing process run more smoothly.
Explore the embroidery digitizing services offered by Rise Digitizing to learn more about preparing your artwork for embroidery.
Frequently Asked Questions
What is the main purpose of embroidery digitizing services?
The main purpose is to convert artwork into stitch instructions that an embroidery machine can read. The file defines the stitch types, direction, density, and sequence needed to reproduce the design on fabric.
How much do embroidery digitizing services cost?
Pricing depends on design complexity, size, stitch requirements, and turnaround time. Rise Digitizing lists starting prices from $9 for qualifying designs on its website. More complex projects may cost more.
Which file format should I choose for my embroidery machine?
The correct format depends on your machine and software. DST, PES, EXP, JEF, and VP3 are common options. Check your equipment’s requirements or provide the machine model when ordering.
Can an existing logo be converted into an embroidery design?
Yes. Existing logos, illustrations, and other artwork can generally be digitized. However, small details or thin lines may need adjustments to work at the final embroidery size.
Are custom embroidery digitizing services in USA suitable for small businesses?
Yes. Small apparel brands, local embroidery shops, promotional product suppliers, and independent decorators can use custom digitizing services for individual orders and repeat production.
Why should I test a digitized design before bulk production?
A test sew-out helps confirm that the file works with the selected fabric, stabiliser, thread, and machine settings. It can reveal issues with lettering, registration, coverage, and fabric movement before multiple garments are produced.
Get Your Artwork Ready for Embroidery
Successful embroidery begins with a file designed for the way the finished product will be stitched. Correct stitch planning, suitable machine formats, and careful testing can help produce clearer logos, more consistent results, and fewer production problems.
If you need professional embroidery digitizing services, prepare your artwork and include the finished size, fabric, placement, and machine format. Visit Rise Digitizing to explore its services and get your next embroidery project ready for production.